Cmos Motorcycle Alarm Schematic: Build Your Smart Security System
Description
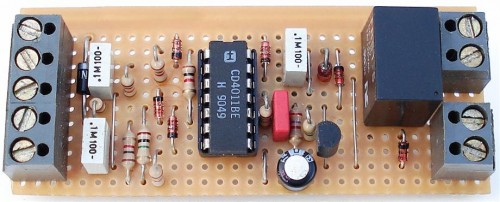
This circuit delivers an intermittent alarm output and incorporates an automatic reset function. It can be operated manually utilizing a key-switch or a concealed switch; alternatively, it can be wired to engage automatically upon disabling the ignition. Integrating external relays enables immobilization of the bicycle—such as flashing the lights.
Integrated Circuits play a crucial role in this system. The core of the operation relies on a microcontroller, a complex integrated circuit that manages the timing and control signals for the siren and other components. This IC effectively acts as the brain of the alarm, interpreting switch inputs and coordinating the activation of the siren. Its precise timing and control capabilities are fundamental to the system’s overall functionality.
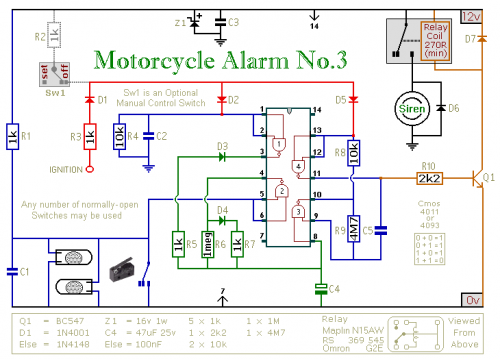
Schematic Diagram
Notes
Any number of normally-open switches can be implemented. Utilize “tilt” switches that activate when the steering is moved or when the bicycle is lifted from its side-stand or pushed forward off its centre-stand. Employ micro-switches to safeguard removable panels and the lids of panniers, and so on.
Once activated, the rate at which the siren engages and disengages is governed by R9 and C5. For instance, increasing the value of C5 will slow down the process, while decreasing the value of R9 will accelerate it.
While at least one switch remains active, the siren will sound. Approximately thirty seconds after all switches are opened, the alarm will reset. The duration of this reset time depends on the characteristics of the utilized components. Adjust the timing to meet your requirements by modifying the value of R6 and/or C4.
The circuit is designed to accommodate an electronic Siren demanding a current draw of 300 to 400mA. It’s generally not advisable to use the bicycle’s own Horn, as it can easily be located and disconnected. However, if you opt to utilize the Horn, bear in mind that the alarm relay is too small to sustain the required current. Connect the coil of a suitably rated relay to the “Siren” output. This can then be employed to sound the Horn, flash the lights, and so on.
The circuit board and switches must be protected from environmental elements. Dampness or condensation will cause operational malfunctions. Connect the 1-amp in-line fuse AS CLOSE AS POSSIBLE to your power source. This is VERY IMPORTANT. The fuse serves to protect the wiring, not the alarm. The specific installation method will vary depending on the make of your particular machine, and therefore further guidance is unavailable.
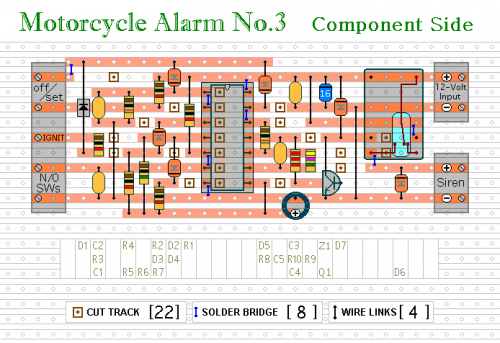
The quiescent (standby) current of the circuit is virtually zero—meaning there is no drain on the battery. If you want to operate the alarm manually, employ a key-switch or a concealed switch connected to the “off/set” terminals. For automatic operation, connect a wire from the ignition circuit to the “ignit” terminal. Subsequently, every time you disable the ignition, the alarm will automatically set itself. Note that this wire from the ignition switch is not protected by your 1-amp in-line fuse. Therefore, unless its duration is very short, implement a separate 1-amp fuse as close as possible to its source.
When the alarm is set, if one of the switches is closed, the siren will sound. This could cause disturbance late at night. A minor alteration will enable you to Monitor The State Of The Switches using LEDs. When the LEDs are all off, the switches are all open, and it’s safe to activate the alarm.


